A timeless look and a visual texture that is recognizable to many. Tiling your surface using the herringbone pattern will no doubt create interest and add dynamism to the project. But is there more than one way to put together a herringbone tiled surface? If so, what are the variants and how do you create them? In this article, we will look at how to create a basic herringbone tile pattern. Additionally, we will explore the many ways that tiling a herringbone pattern can be achieved.
Why Consider Herringbone Patterns for Tiling
Before we get into the way a herringbone tile pattern is produced, we will look at why it is good to consider it for projects. So why is the herringbone pattern a good one to consider? One reason is because it is a style that is visually interesting and adds to the elegance of projects in which it is used. Another reason herringbone is often selected is because it allows the tile installer to use one size of tile to create the pattern. So in short, the herringbone pattern offers a lot of styling while at the same time remaining relatively simple. But no matter what term you use to describe the herringbone tiling pattern, whether you use jazzy, elegant, dynamic, interesting, or some other adjective, it is a pattern that pays to consider. Notice what the description for
this pinterest board says about the herringbone tiling pattern:
The herringbone tile pattern enables you to create an intricate-looking design with one tile shape and size. You can use tile of all the same color, change colors in a stripe, create an ombré effect, or mix colors randomly.
So the herringbone tiling pattern offers some relatively easy ways to boost the visual interest of the tiling project. And as we will get into a bit later, these interest boosts an be achieved with some simple variations.
Basic Herringbone Patterns
While searching for tiling ideas using the herringbone pattern, you will find very quickly that some refer to the chevron tiling pattern as herringbone. Yet, there is a basic difference between the two. We won't get into an in depth explanation here, but if you would like, you can read about the differences in our article entitled:
Herringbone vs Chevron. That article mentions some of the herringbone variants we will talk a bout here, but it primarily focuses on how the herringbone pattern is different from the chevron pattern. Here, we will elaborate more on each of the herringbone variants as they relate to tiling walls, backsplashes, floors, and other surfaces.
45 Degree Herringbone
Creating the 45° herringbone pattern is easy once you get the first few steps executed accurately. What are the steps to creating the 45° herringbone?
Find the center point of the area you are tiling.
Choose a starting point depending on the type of project you are working on.
Begin tiling based on the type of project on which you are working.
Repeat the pattern row by row until the edges of the area being tiled is reached.
Step 1: Find The Center Point
Whatever area you are tiling, you will need to be aware of where the center of the area is. If you are working on a wall, it may have more than one pattern. If so, you will select the center point of the area that will have the herringbone pattern.
On floor tiling projects your challenge will be in trying to find the center of an area that is irregularly shaped. In these cases, you will need to consider where you will want the pattern to be radiating from so it will feel even. The symmetry of the pattern may or may not be readily noticeable depending on the shape of the area of your project.
Step 2: Choose Your Starting Point
If you looked at the herringbone patterns in the pinterest board link above, you may have noticed that for the most part, the examples basically show the same pattern and that the differences are found in the tile colors that are used to create them. Many of those examples demonstrate the herringbone tile pattern constructed at a 45° angle on a wall. If your project is on a wall, your starting point will be on the bottom of the wall in the center of the row. However, if you are working on a floor, there is something else to consider.
Tiling a floor still requires you to find the center point. However, your pattern direction must also be selected. When the herringbone pattern is completed, it has a directional element in it. The tiles form what look like arrows pointing in alternating directions. One set resembles arrows aimed a a specific direction while the next column aims the opposite direction. This pattern repeats going to the left and to the right until the space is filled. Therefore, selecting your starting point is more involved if you are working on a floor because you have to also think about the direction your "arrows" will point.
For wall projects, your starting point can be at the bottom of the area you are tiling. For floors, you will usually begin at your center point and radiate out in all directions.
Step 3: Begin Tiling Based On Project Type
For tiling a wall, it is recommended that a ledger board be used. A ledger board is simply a completely straight board that you mount to the wall for your first row of tiles to rest on. Mounting your ledger board so that the top edge of it is exactly one row (plus the space needed for grout) high. This gives you a sturdy surface on which to rest your tiles until the thinset cures. Then, your ledger board can be removed and your bottom row of tiles can be put in place to finish the project.
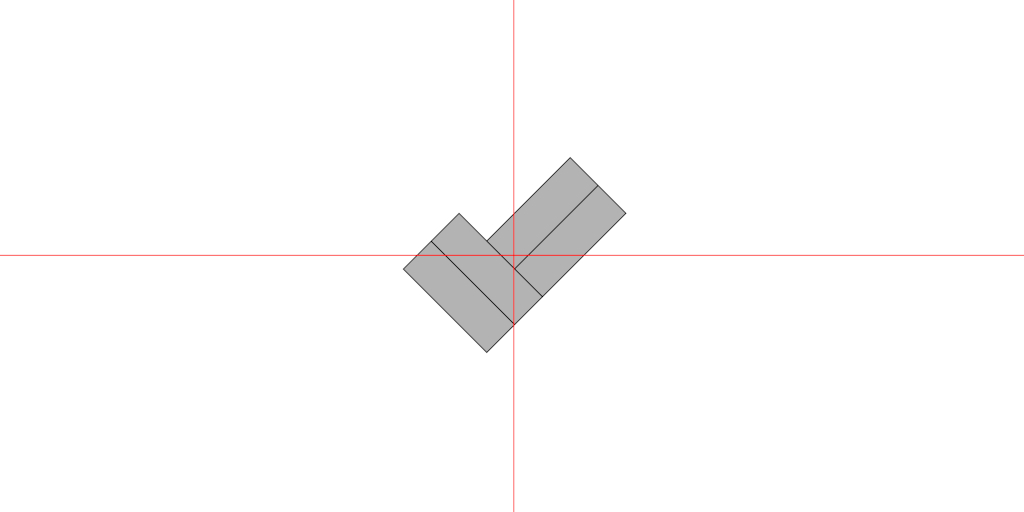
The placement of the first tile is extremely important because it will be the one the rest of the tiles align with. For wall projects, your first tile will be placed on your ledger board with the tile angled 45° and with the tile edge placed so that the center of your tile's edge will be on the center line of the wall section. Now you can place the subsequent tiles so that the short side of one tile is against the long side of another with the edges even. Using spacers will ensure that your spacing is even and that your pattern remains aligned properly.
For floors, you will begin tiling at your selected starting point keeping in mind the direction you want your pattern "arrows" to "point".
Placing your first tile in floor tiling projects is equally important since all your tiles will be aligned off the first one. As we have mentioned, the pattern will have obvious arrows that point in a specific direction. A poorly placed first tile will result in your "arrows" pointing in a direction you don't want them to. Or, they may not point exactly at the focal point at which you aim them. For this reason, it is recommended that you that you dry fit the tiles prior to setting them permanently using your bonding material.
Step 4: Repeatedly Place Tiles
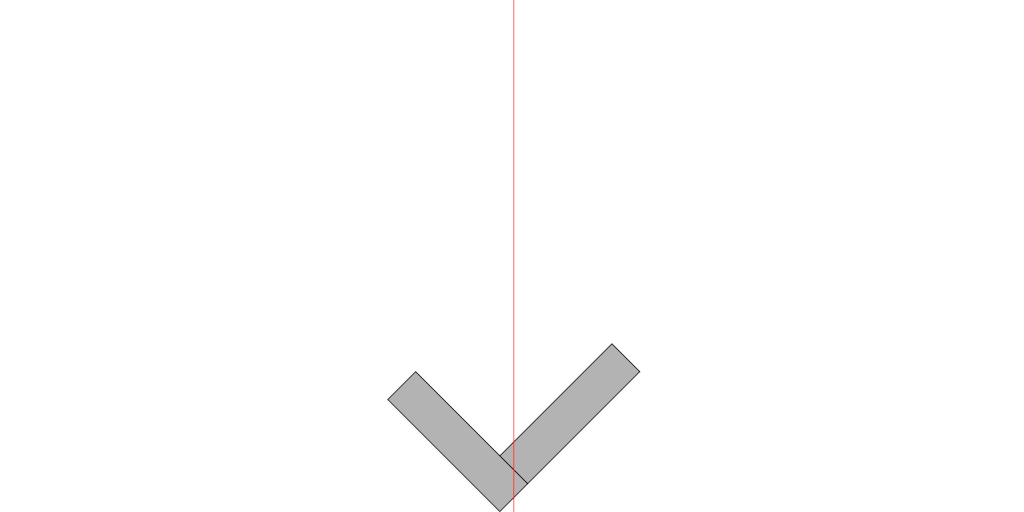
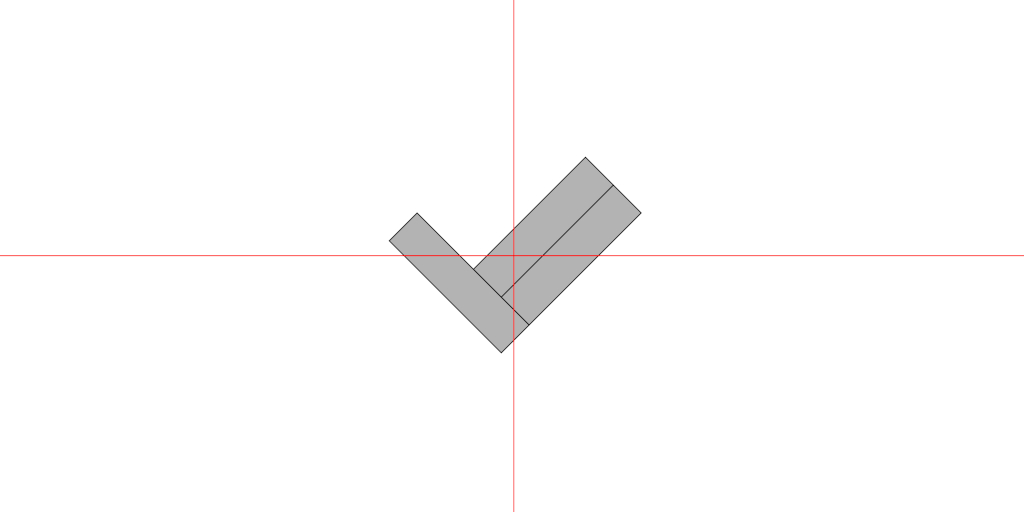
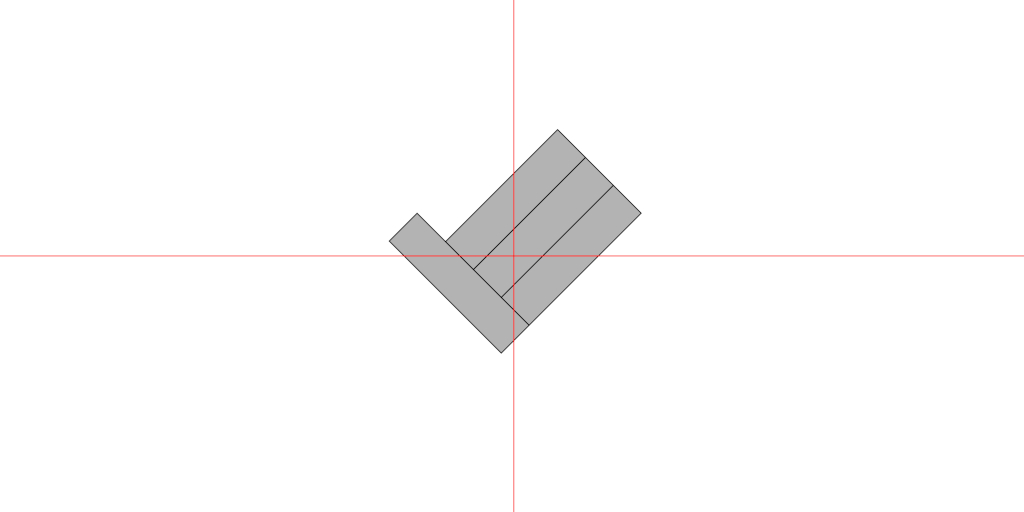
After placing your first tile, align the second one as is shown in the image below:
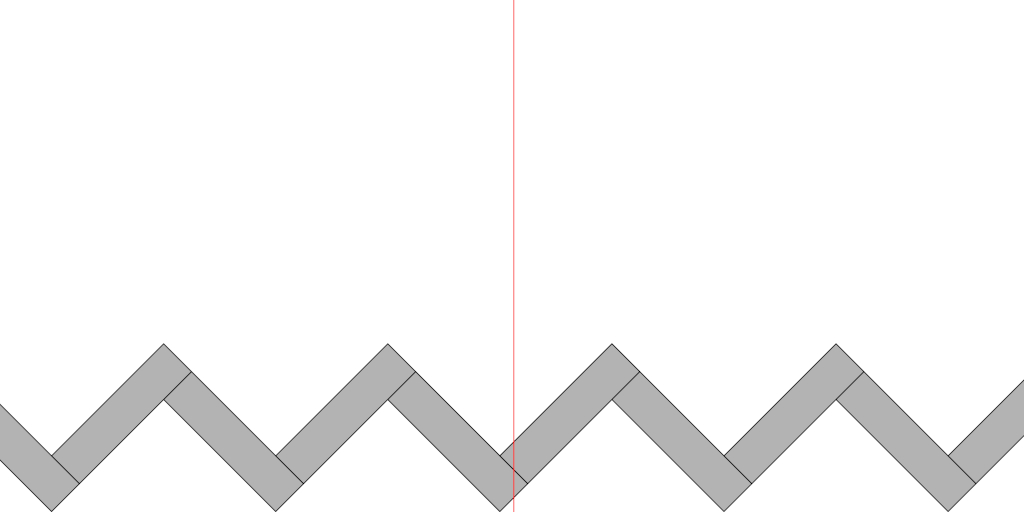
For wall projects, continue repeating the pattern established by the first two tiles so that the first row looks like the representation in the following image:
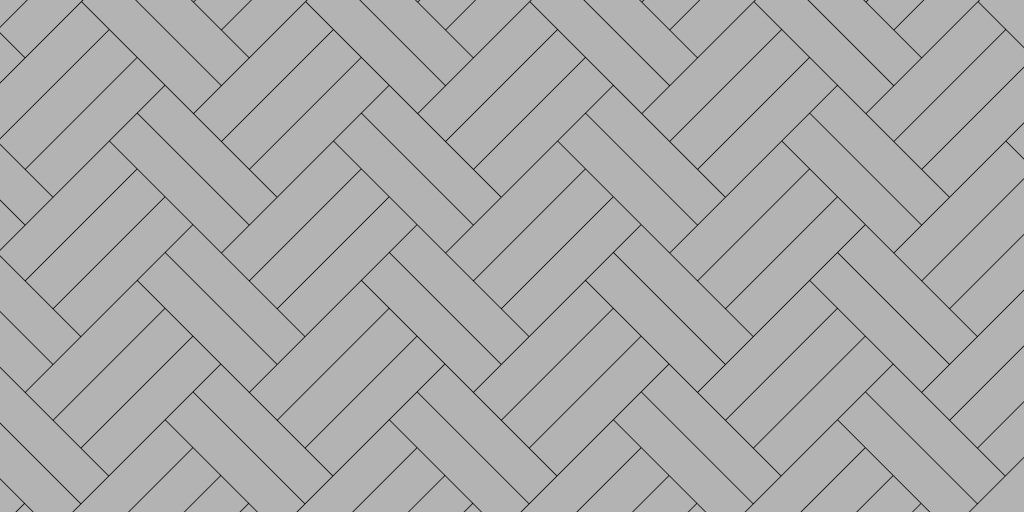
Continue placing rows in this arrangement and working your way up the wall and making your cuts for the tiles on the edges.
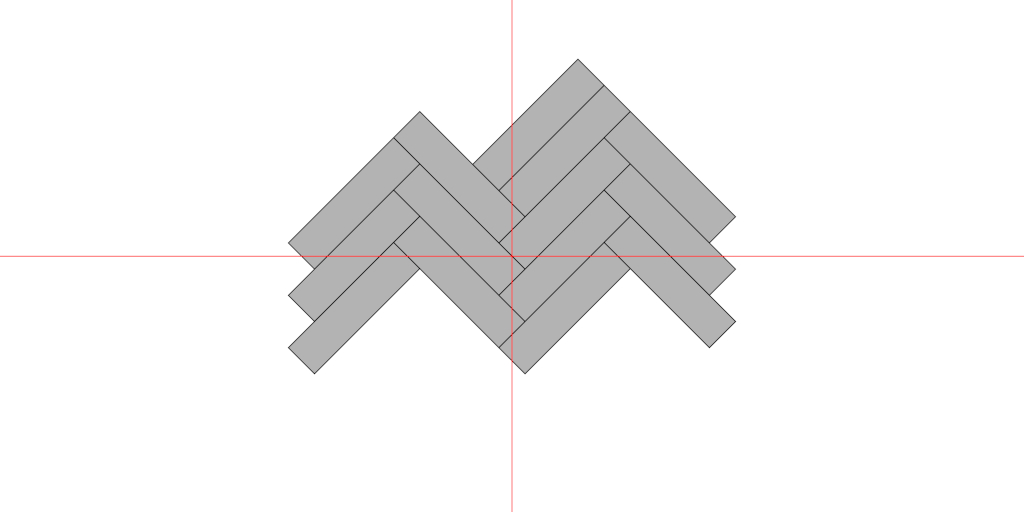
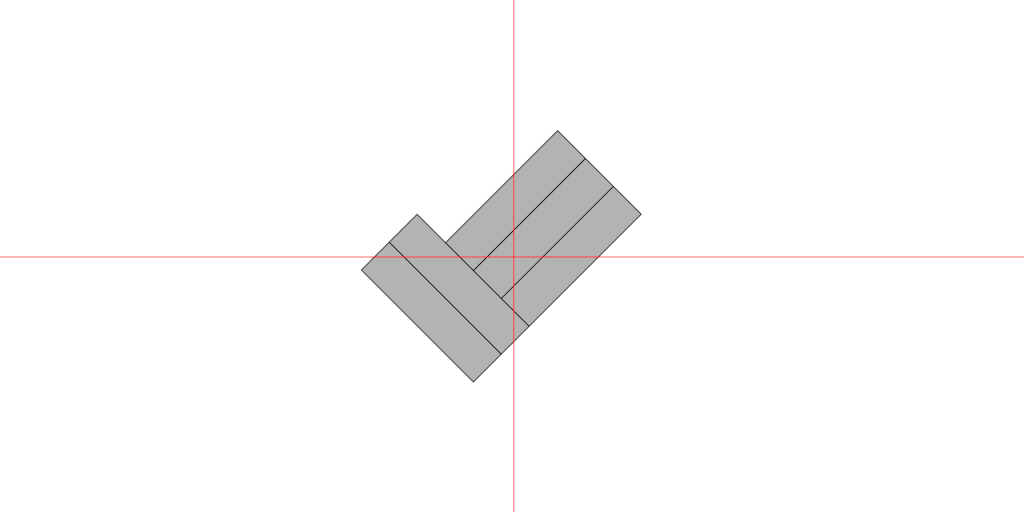
For floor projects you can work out from your first two tiles placed in the center. So, your working pattern may look more like that in the following image:
Working outward from the center point, you can fill in the rest of the pattern using tiles. For the edges, you will need to make cuts to create tiles of the correct shape and size.
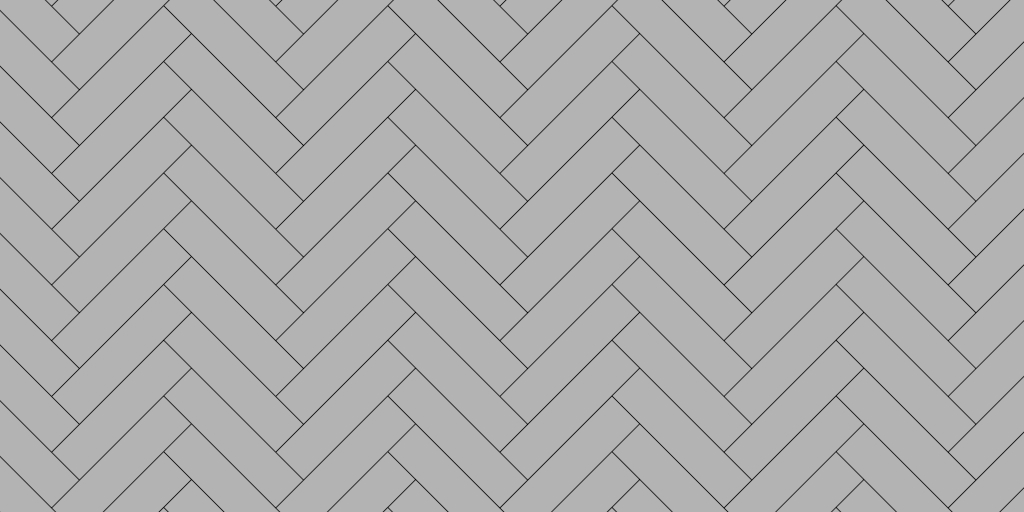
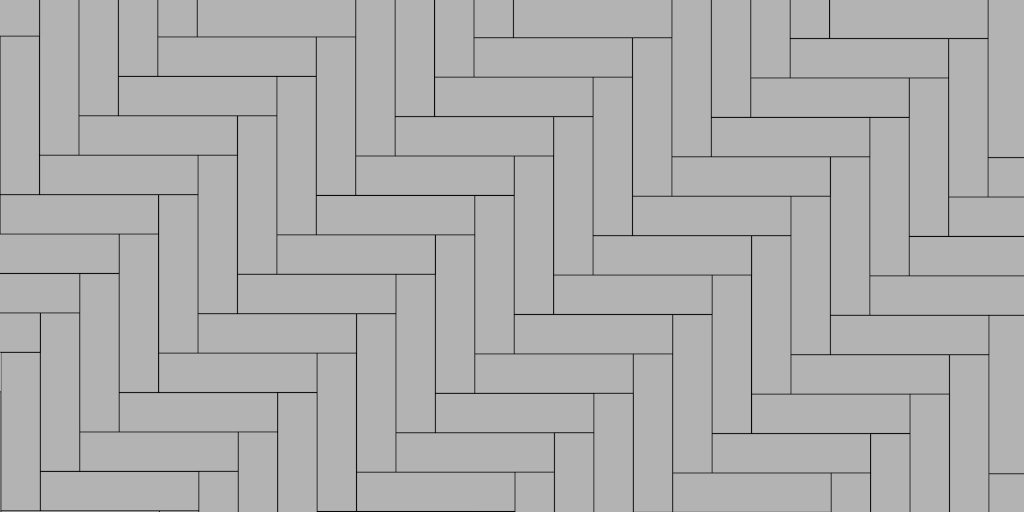
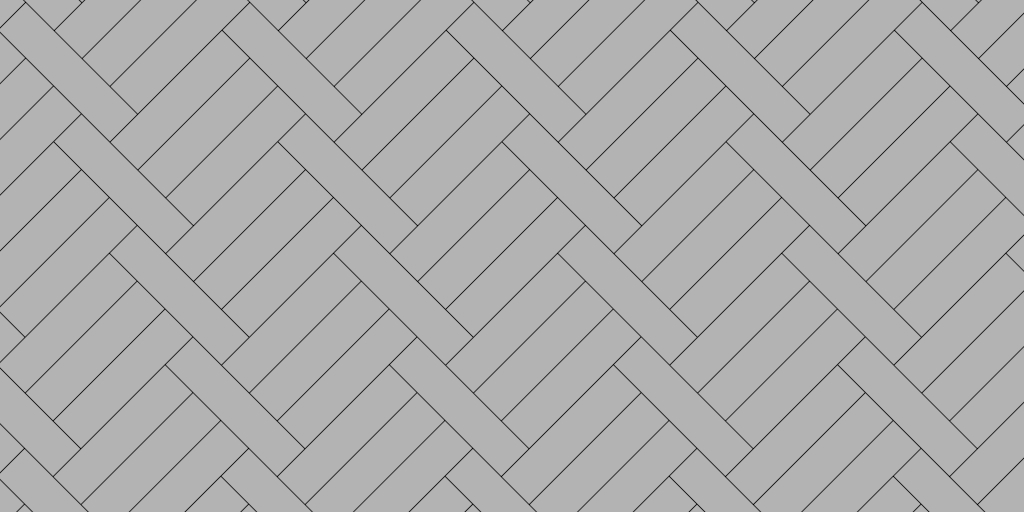
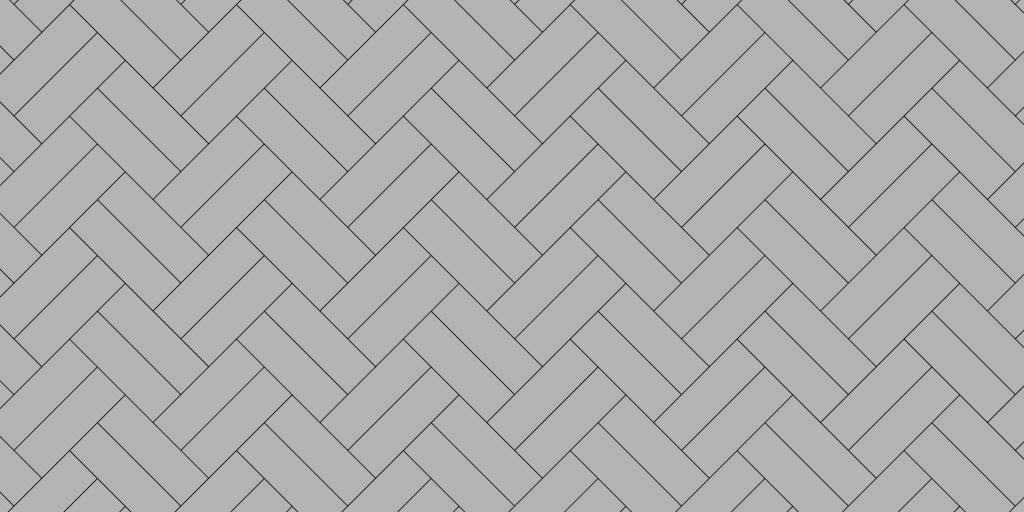
Once the entire surface is completed using the 45° herringbone pattern, it will look like the following image when you look at the surface and you are directly facing either the wall on which the pattern is applied, or the a wall adjacent to the floor on which the pattern has been affixed.
90 Degree Herringbone
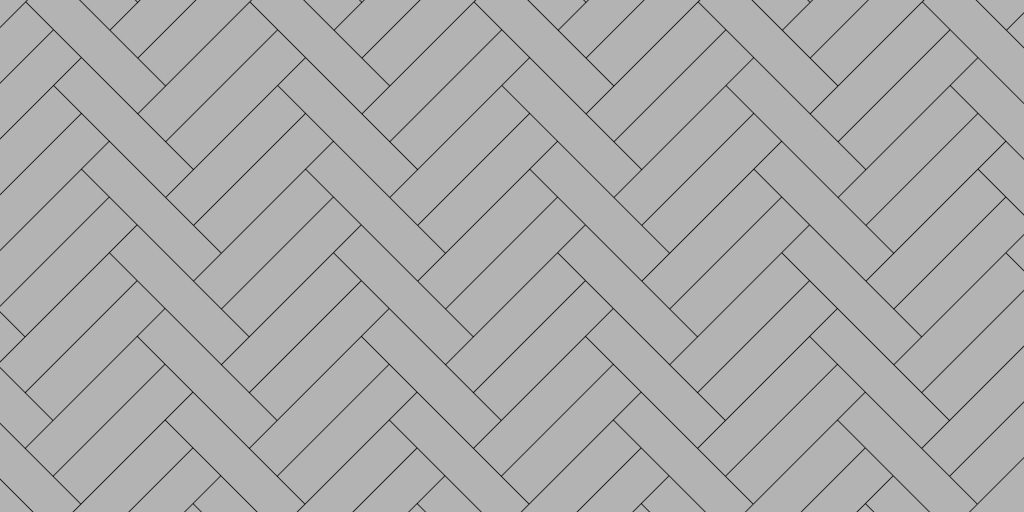
This variation of the herringbone pattern is assembled exactly like the previous variation we looked at (45 degree herringbone pattern) except it is aligned at a 90 degree angle in relation to the center lines. So if you are facing a wall and looking at the surface (whether it is on the wall or the floor), it will look like the following after you have placed the first two tiles:
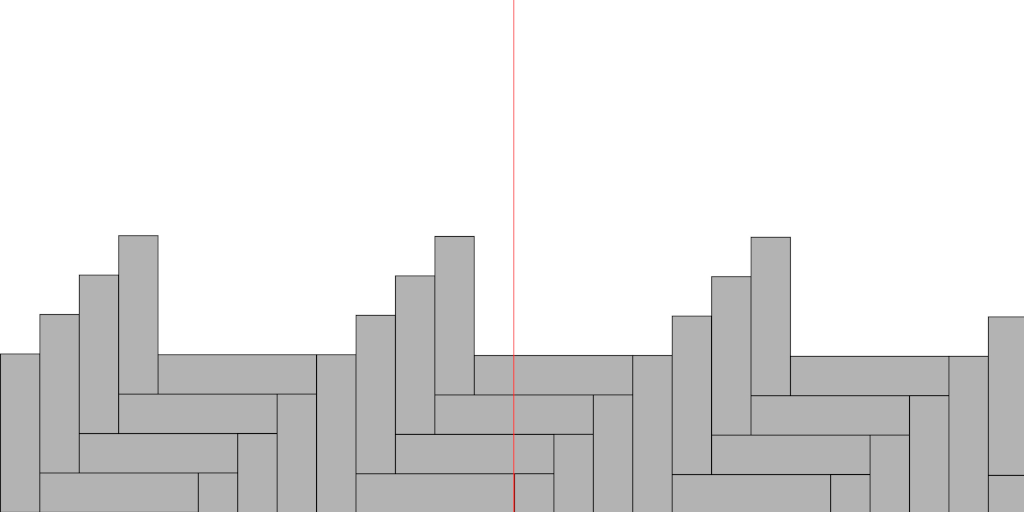
When laying your first row of tiles, you will have to go up and to the right each time you start a new tile pair. Depending on the width to length proportion of your tiles, you will find that you have to work on more than one row at a time. For example, in our demo image below, we are using tiles that are four times as long as they are wide. So, the easiest way to place them is to place the first tile vertical in the lower left corner, then place the second tile horizontally just to the right of the first. But then, place the third tile vertically on the second tile all the way to the left. The fourth tile, horizontally on top of the second tile. Repeating this pattern until you have four "L" shapes nested one inside of the other (the number of these matches the ratio of your tile's length compared to its width) and then you drop back down to your bottom row for the next full length vertical tile. Once the first four rows have been completed your surface will resemble the following representation:
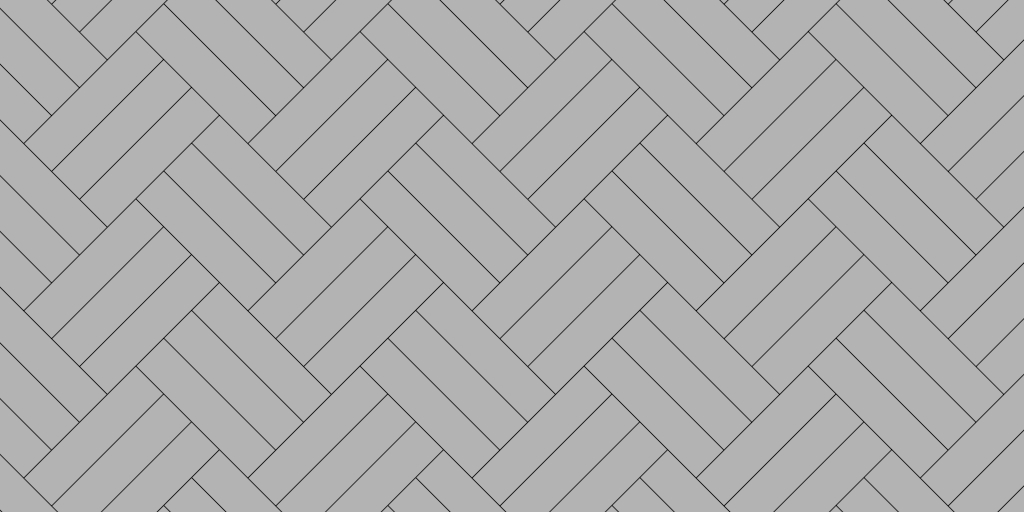
After all the tiles for your area have been placed in a 90 degree herringbone pattern, you should be able to align yourself with an outer edge of the surface and view a pattern that resembles the following representation:
Herringbone Pattern Variants
Now that we have looked at the basic herringbone variations, we will look at examples of some of the variations of the herringbone pattern. Keep in mind that each of these variations of the herringbone pattern can be formed in the 45° or the 90° orientations. You begin these patterns the same way you begin the previous two. However, as you place the tiles, you arrange them in a different order. Let's take a look at some of these variations.
Herringbone 1:2 Variant
For the 1:2 variant of the herringbone pattern, you begin the pattern the same as before, but you use a 1:2 ratio instead of a 1:1 like we showed earlier. So, the first three tiles placed might look like the following:
As you can see, the pattern is identical to the other one, you just double up tiles in one of the positions. The following image represents the 1:2 variaton of the herringbone pattern.
Herringbone 1:3 Variant
The next variant of the herringbone pattern that we will demonstrate is very similar to the previous one. The only difference is that the tile pattern is 1:3 instead of the previous ratio of 1:2. To perform this variant of the herringbone pattern, you must be using tiles that are at least 4 times as long as they are wide. This is because you need to be able to line up on long side of a tile with three of the short sides of the tile and still have overlap. So, you can use a tile that is 4" x 16", 3" x 12", 5" x 15", or some other size. You just need a tile that is at least four times as long as it is wide. So if we were using a tile that is 6 times as long as it is wide to represent this pattern, the beginning 4 four tiles would be arrange like so:
Just like we have been doing up to now, the pattern is repeated until the area is filled up. If it is a floor, working out from the center point and paying attention to the direction of the tiles is key since it can enhance the overall look of the project. Here is a representation of a completed herringbone 1:3 variation at 45 degrees.
Theoretically, you can create many other variants using other tile sizes using 1 by ? variations. We won't demo all of them here, but you get the idea. It all centers around the size of the tile you are using. However, you can also achieve 2 by ? variations as well. Let's look at some of those now.
Herringbone 2:3 Variant
Well, you may have already concluded this variation based on what we have considered up to this point. But all of the variations you can achieve with tiles fit for 1 by ? herringbone patterns can be done in a 2 by ? arrangement. The 2:3 variation is exactly like the 1:3 variation except you use 2 tiles oriented one way and 3 tiles oriented in the other direction. So, the first five tiles in this pattern would look like so:
Again, repeating the pattern upward if you are working with wall tiles and outward from a center point if you are creating a pattern on a floor yields the completed pattern represented in the following image:
Now that we have taken a look at some of the variations of the herringbone pattern that stem from using 1 tile paired with a multiple of the same size tile in a different orientation, let's build on the principle to see how even more variations of the herringbone tiling pattern can be constructed.
Herringbone Variants With Matching Multiples
It may not be clear what we mean by "variants with matching multiples" so we will describe them here. The previous variants we have mentioned use tiles angled at two separate orientations. For example, a 45 degree 1:3 herringbone pattern would have 3 tiles oriented a certain way for each tile that was oriented another way. Hence, the 1:3 proportion that is used to describe the variant.
When we say "matching multiples", we mean that both numbers on each side of the colon (:) match and that they are not the number "1". Let's look a couple and it will make more sense.
2:2 Herringbone Pattern
The 2:2 herringbone pattern is one that we call a variant with matching multiples because the numbers on both sides of the colon match one another and the numbers are greater than 1. As you would expect, the 2:2 variant of the herringbone pattern at 45 degrees would look like the following image after placing the first four tiles.
As you can see in the image above, two of the tiles are angled at one direction and the other 2 are angled in the other direction. This is where the 2:2 comes from in our description of the pattern. Repeating the four tiles as shown above to an entire area would produce the following pattern in its completed form.
One important thing to note here is that the tiles can only be duplicated at least one less number of times than their length is a multiple of their width. That might sound a bit complicated, so here is a table of some examples:
Pattern Description
Tile Length
Tile Width
Length/Width
Number of Tiles Direction 1
Number of Tiles Driection 2
2:2 Herringbone (9"x3")
9"
3"
3
2
2
2:2 Herringbone (12"x4")
12"
4"
3
2
2
3:3 Herringbone (12"x3")
12"
3"
4
3
3
2:2 Herringbone (18"x6")
18"
6"
3
2
2
2:2 Herringbone (24"x8")
24"
8"
3
2
2
3:3 Herringbone (24"x6")
24"
6"
4
3
3
You can see from the table above that in order to create these types of variations, you must be able to orient multiple tiles in both directions and still have enough room for overlapping. Were the tiles to line up evenly when situated following the procedure mentioned, they would be a basketweave pattern instead of a herringbone. Lets look at one more variation of the matching multiples herringbone pattern.
3:3 Herringbone
Following the above requirements like we did with the 2:2 herringbone. We take a tile that has a length four times its width and begin the pattern. Placing the first three tiles angled 45° to the left and the second three tiles angled 45° to the right we come up with the following starting image:
Then, repeating this arrangement throughout the entire area, you end up with a pattern that looks like the following depiction of the 3:3 herringbone pattern at a 45 deg° angle.
As we have discussed, there are numerous ways you can achieve a herringbone pattern. Some of the factors include the surface type, the size of your tiles and the preference of the owner are all aspects of the project to keep in mind. One thing is for sure though, adding the herringbone pattern to your arsenal of tiling patterns will afford you the ability to create a herringbone pattern for just about any area, project, and design you need to.